
 DoseCraft
 VapeHeatLab
Custom Chocolate Mold DIY Part 1: Easy 3D Print Guide
Welcome to custom chocolate mold diy part 1 — the first episode in Fordee's multi-part series on how to make custom chocolate molds for cannabis edibles at home. This part covers everything before the silicone: modeling the blank in 3D software, printing it on a resin or FDM printer, and sealing it for the pour. ...
Welcome to custom chocolate mold diy part 1 — the first episode in Fordee’s multi-part series on how to make custom chocolate molds for cannabis edibles at home. This part covers everything before the silicone: modeling the blank in 3D software, printing it on a resin or FDM printer, and sealing it for the pour. If you are looking for how to make molds for edibles from scratch, this is where you start.
Custom Chocolate Mold DIY Part 1: What Is a Mold Blank?
A mold blank is the positive master object — the physical shape you want your chocolate to take. The silicone poured around it in Part 2 picks up every surface detail, creating the negative cavity you pour chocolate into. For this custom chocolate mold diy part 1 project the blank is a 10×5 cm rectangular bar with “420” subtracted from the face — the perfect shape for infused cannabis chocolate bars.
How to Make Custom Chocolate Molds: 9-Step 3D Design
Here is how to make custom chocolate molds starting from scratch in Cinema 4D. The same technique works in Blender (free) or any other 3D app that supports volumetric modeling:
- Open Project Settings (Cmd+D / Ctrl+D) and change scale from centimetres to millimetres.
- Create a Rectangular Spline — width 100 mm, height 50 mm. Enable corner rounding and set radius to 7 mm for a classic candy bar edge.
- Apply an Extrude to the spline — set depth to 10 mm (1 cm).
- Create a Text Spline — type “420”, set height to 50 mm. Center it on the rectangle using Tools → Arrange Objects → Center.
- Apply a second Extrude to the text — set depth to 5 mm.
- Create a Volume Builder. Drag the rectangle extrude in as the base layer (Union) and the text extrude in above it set to Subtract. This hollows the “420” from the bar face.
- Add a Smooth Layer inside the Volume Builder — voxel distance 3, iterations 2. Drop the main voxel size to 0.05–0.1 mm for detail.
- Add a Volume Mesher — drag the Builder in. Set Adaptive to 1% to shrink file size. Press C to make it an editable polygon object.
- Export as STL (File → Export → STL) — confirm scale is millimetres and save.
3D Printed Chocolate Mold: FDM vs Resin
For a 3D printed chocolate mold blank, resin is the better choice. Resin printers produce smoother surfaces with finer detail than FDM — important because every surface imperfection transfers to the silicone and then to your chocolate. FDM blanks often have small layer gaps or surface pitting that require sanding before use. A resin 3D printed chocolate mold blank for this 10×5 cm design prints in under two hours on most consumer MSLA printers.
For slicing, use ChituBox (free) or equivalent. Import your STL, rotate the model 45° for best print quality, add auto-supports, slice, and export to your memory card.
How to Make Molds for Edibles: Sealing the Blank
Before any silicone contacts your blank, you need to seal it. Here is how to make molds for edibles safely — bare resin can inhibit platinum-cure silicone from setting properly, leaving a sticky surface that ruins the mold. Spray the finished blank on all sides with a clear varnish. Two light coats and a 24-hour dry time are enough. Once sealed, the blank is ready for the silicone box and pour covered in Part 2.
Custom Edible Molds: What Comes Next in Part 2
Part 1 gives you a sealed, print-perfect blank — but the custom edible molds themselves get made in Part 2. That episode covers building the acetate walls around the blank, mixing and pouring food-grade platinum silicone, curing for 24 hours, and pulling the finished mold to test with cannabis-infused chocolate. Watch it here: Custom Chocolate Mold DIY Part 2.
Frequently Asked Questions
Do I need Cinema 4D for this custom chocolate mold diy part 1 project?
Can I use an FDM printer for the mold blank?
Why varnish the blank before the silicone pour?
Is this method good for custom edible molds beyond chocolate?
References
Where to Buy
- Cinema 4D
- Blender
- Anycubic Photon Mono 4k Resin Printeraffiliate
- Anycubic 3D Printer Resin (White)affiliate
- Anycubic Wash and Cure Stationaffiliate
- Cannabis Apparel Store
Some links above are affiliate links. We may earn a commission at no extra cost to you.
From the Shop
See all
Related Posts
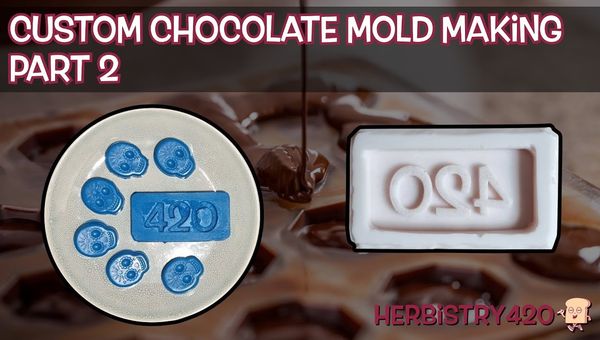
Custom Chocolate Mold DIY Part 2: Easy Silicone Pour Guide
Welcome to custom chocolate mold diy part 2 — the episode where we mix the silicone, build the acetate box, pour it over our blank, cure it for 24 hours, and test the finished mold with infused cannabis chocolate. If you have not printed and sealed your blank yet, start with Custom Chocolate Mold DIY ...

How to Use Cannabis Honey Pulp: 5 Easy Ways
After making cannabis-infused honey with the by:Noids or any infusion device, you end up with a sticky, fragrant leftover. Wondering how to use cannabis honey pulp instead of tossing it out? This guide covers 5 practical cannabis honey pulp usage ideas that squeeze every last drop of value from your infusion — from simple tea ...

How to Decarb Hash and Kief for Edibles (Temperature and Time)
Knowing how to decarb hash and kief is the first step in making any hash-based edible — cannabutter, infused oil, tinctures, or infused syrup. Raw hash and kief contain THCA, not THC. Decarboxylating hash converts THCA to active THC by applying low, steady heat. Skip this step and your edibles will barely work. This guide ...