Alcohol Bottle Bong DIY: 5 Steps to Build One
Alcohol bottle bong DIY projects are one of the most satisfying ways to repurpose an empty liquor bottle into a functional glass water pipe. With a diamond drill bit, a washer, a downstem, and some silicone, you can build a solid homemade bong that actually hits beautifully. This alcohol bottle bong step by step guide ...
Alcohol bottle bong DIY projects are one of the most satisfying ways to repurpose an empty liquor bottle into a functional glass water pipe. With a diamond drill bit, a washer, a downstem, and some silicone, you can build a solid homemade bong that actually hits beautifully. This alcohol bottle bong step by step guide walks you through the complete process from drilling to smoking.
What You Need for an Alcohol Bottle Bong DIY
Before you start, gather these supplies. The most important item is the glass bottle bong diamond drill bit — without it, you cannot cut a clean hole in glass. Everything else is inexpensive and available at most hardware stores or Amazon.
- Empty glass liquor bottle — any brand, thicker glass is better
- Diamond drill bit — a cylindrical diamond core bit sized slightly larger than your downstem diameter
- Metal washer — sized so the diamond bit fits through the center hole
- Electrical or gaffer tape — to secure the washer to the bottle
- Downstem and bowl — standard 14mm or 18mm glass pieces work
- Silicone sealant — food-safe or aquarium silicone to seal the downstem
- Cordless drill — with variable speed control
- Water spray bottle — to cool the bit and contain glass dust
- Safety goggles and dust mask — mandatory; glass dust is dangerous
Alcohol Bottle Bong DIY: 5 Steps to Build One
Step 1: Remove the Bottle Stopper and Prep the Surface
Most liquor bottles have a pour stopper insert in the neck. Use a flathead screwdriver or similar tool to pop it out — this gives you an unobstructed path through the bottle for drawing smoke. Rinse the bottle thoroughly to remove any residue. Choose your drill location: the side of the bottle, positioned low enough that water will cover the bottom of the downstem when filled.
Step 2: Secure the Washer as a Drill Guide
This is the most critical step in the alcohol bottle bong step by step process. Without a guide, the glass bottle bong diamond drill bit will slide across the smooth glass surface and never bite in. Tape a metal washer (sized to fit your bit) directly over your drill spot using electrical tape on both the top and bottom edges. The washer keeps the bit centered and prevents lateral movement as you start drilling.
Step 3: Drill Slowly with Water Cooling
Put on your homemade bong safety goggles glass dust protection — this is non-negotiable. Glass particles become airborne while drilling. Set your drill to a medium-high speed and apply light, even downward pressure — let the weight of the drill do most of the work. Every 10–15 seconds, stop and spray water directly onto the bit. Water serves two purposes: it keeps the diamond bit cool so it cuts efficiently, and it captures glass dust in the water so it doesn’t become airborne. As you approach breakthrough, slow down significantly — this is when the glass is most likely to crack. Take your time and be patient.
Step 4: Clean the Hole and Insert the Downstem
Once through, remove the tape and washer. Rinse the bottle thoroughly — glass dust inside the bottle is dangerous. Lightly sand the edges of the hole with fine sandpaper to smooth any rough spots. Insert your downstem through the hole at your desired angle. If going in straight, a rubber grommet works well. If angling the downstem (recommended for a more natural draw angle), skip the grommet and use silicone instead — a grommet will rotate and lose its seal when the stem is angled.
Step 5: Seal with Silicone and Let It Cure
The DIY bong downstem silicone seal is what makes the bong airtight and functional. Apply a bead of silicone around the downstem where it meets the glass on both sides of the hole — outside and inside if you can reach. Use your finger to press the silicone into any gaps and smooth the surface. Let it dry for at least 2 hours before testing, and wait the full 24-hour cure time before smoking. A proper cure ensures the silicone is fully set and food-safe. Once cured, add water so it covers the bottom of the downstem, load your bowl with herb, and enjoy your alcohol bottle bong DIY creation.
Tips for a Better Homemade Glass Bottle Bong
- Use a larger diamond bit than your downstem diameter — this gives you room to angle the stem and apply silicone around it more easily.
- L-stem downstems let you drill straight in rather than at an angle, which is significantly easier and reduces the chance of breaking the glass.
- Thicker glass bottles are more forgiving when drilling — spirit bottles and some wine bottles are quite thick and drill cleanly.
- Do multiple silicone passes rather than one heavy application — let the first layer tack up slightly before adding a second coat for a cleaner, tighter seal.
- Decorate after drilling — once your bong is sealed and cured, you can paint the glass, add decals, or wrap it for a custom look.
Frequently Asked Questions
What size diamond drill bit do I need for an alcohol bottle bong?
Can I use a rubber grommet instead of silicone?
How dangerous is drilling glass?
How long does the silicone need to dry before use?
References
Where to Buy
- Diamond Drill Bits Setaffiliate
- Black Gaffer Tapeaffiliate
- Makita 18v Driver-Drillaffiliate
- Batteries for Drill (Aftermarket)affiliate
- Cannabis Apparel Store
Some links above are affiliate links. We may earn a commission at no extra cost to you.
Related Posts

Best Barcelona Glass Blowing Event — 5 Things to Know
This Barcelona glass blowing event vlog takes you inside a Boro Fest experience where world-class glass artists gathered to create incredible pieces live. In part 1 of this 2-part series, I share the story of trying to keep up with a group that clearly had no limits — and barely making it home while everyone ...
Best DynaVap Vong-X Stealth Setup — 3 Piece Combo
This DynaVap Vong-X Stealth setup combines 3 pieces into one of the hardest-hitting portable rigs you can carry. In this breakdown, I show you how the Vong-X Stealth, Cap Armor, and a High Artisan J-Hook come together to produce massive clouds with incredible flavor — plus the story of how a session with this combo ...

How to Vaporize Hash with Vapman Click (Step-by-Step Guide)
The most efficient approach to traditional hashish is to vaporize hash with vapman click technique using the manually torch-heated Vapman Click by Inhale. The device signals vaporization temperature with an audible click, removing guesswork from the heat cycle. Traditional hash behaves differently than dried flower — it stores and releases heat differently, requires rhythmic heating ...
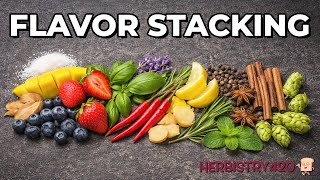
Flavor Stacking: The Taste Trick That Changes Your Cannabis Session
Flavor stacking hits is the practice of intentionally preloading your taste and aroma receptors before a cannabis session to influence how the experience feels. The approach is built around perception, not chemistry. Before a session begins, your senses are already forming expectations. By introducing terpene-rich foods, spices, or aromatic herbs first, you create a sensory ...